A friend and neighbour who had recently moved house was upset to find that the removalists had chipped the veneer of two of her family heirloom pieces of antique furniture – a card table and a French writing desk. She asked for my advice as she had looked at this website and seemed very confident that I could make the repairs.
I appreciated the compliment but at first I didn’t share her confidence as there is obviously a world of difference between the sort of free-form metal powder inlays with which I have decorated several of my platters and vases and the challenge of matching and inserting a new piece of veneer. I therefore suggested that we should get a quotation from a professional furniture restorer for the repair but the estimate of the cost was very substantial.
I then recalled seeing an episode of the fascinating BBC TV ‘Repair Shop’ series in which the furniture restorer had repaired similar damage using epoxy filler and careful staining / painting to match the surrounding wood.
It seemed that the filling the defects wouldn’t be too difficult but that the colour matching would be tricky. Fortunately my wife Lucy has the requisite oil painting skills and always welcomes a new challenge.
With some trepidation, but helped by a useful video, we started off with the chip on the leg of the card table as any flaws in our joint operations on this piece would not be in a direct line of sight
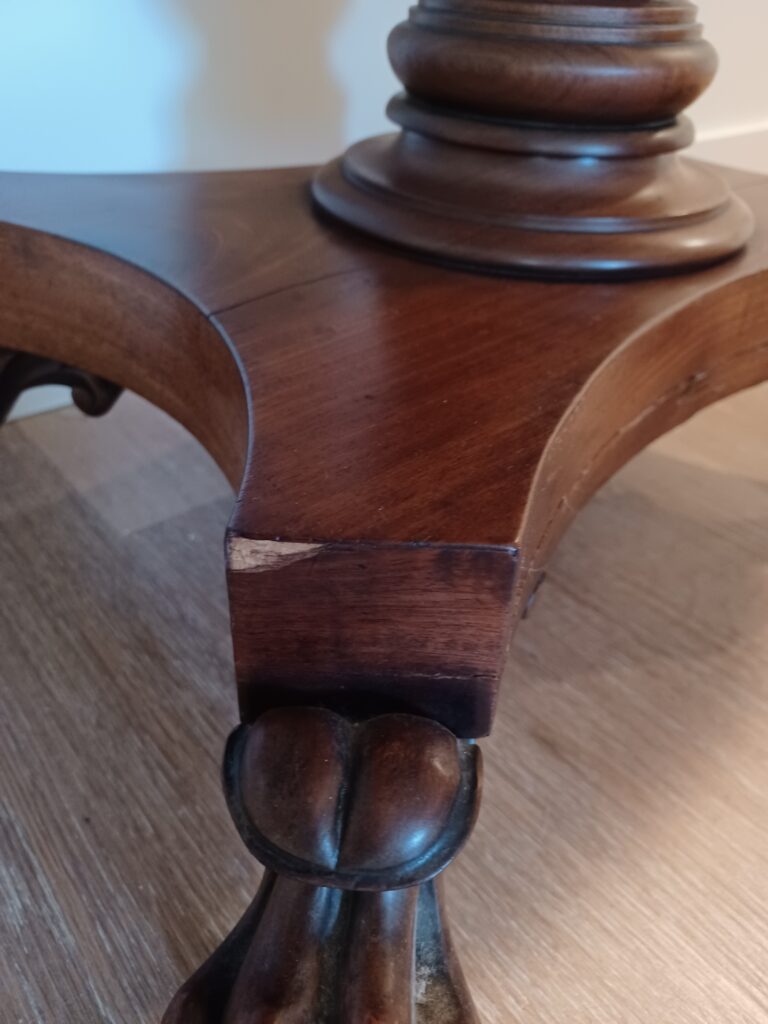
It turned out quite well …

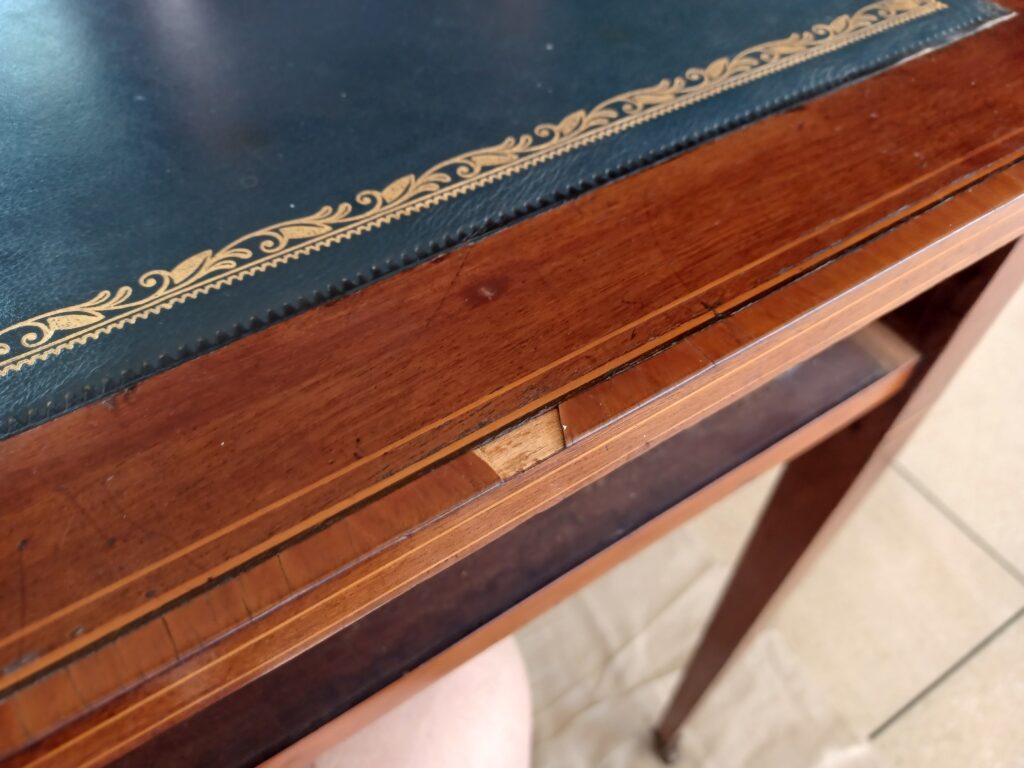
…so thus emboldened we set out to tackle the writing desk.
This was a much bigger challenge as the chip in this case was on the front edge and any shortcomings in the repair would be very obvious.
The repair itself is not difficult – you just have to clean out any loose debris and make sure to use a suitable epoxy filler such as KwikWood (QuickWood in USA/Amazon). This type can be easily molded and sets hard. Ordinary wood fillers are too soft and fragile for an unsupported edge defect.

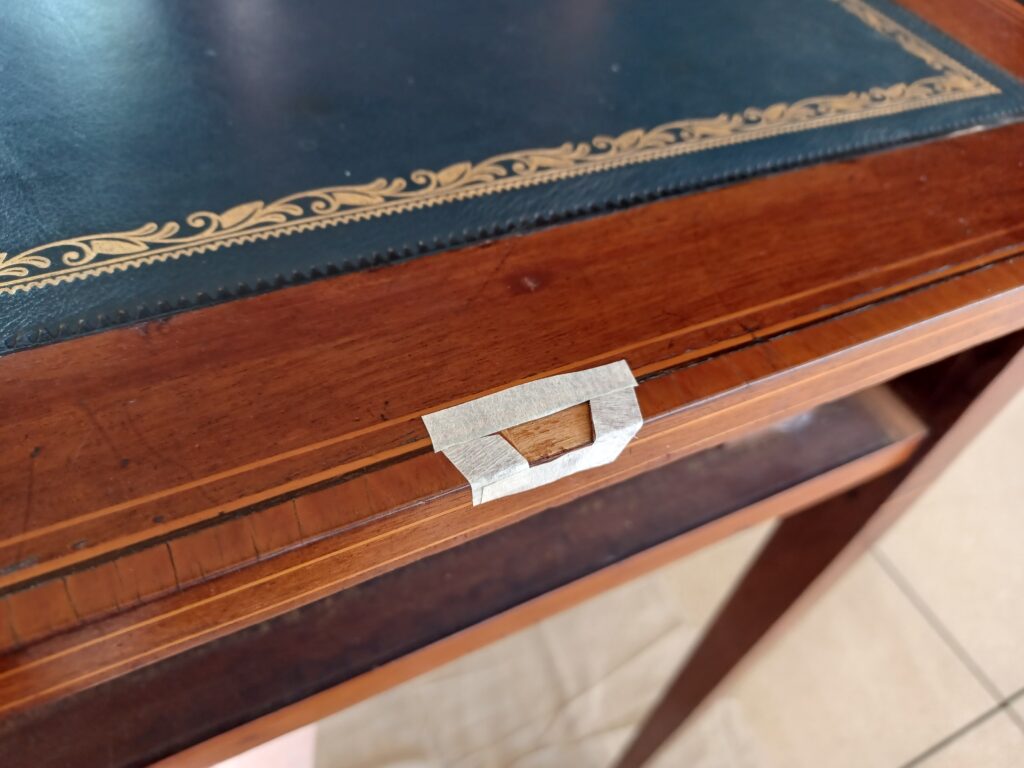
It’s best to protect the surrounding veneer with masking tape:
 The filler sets in an hour or so and can then be carefully sanded with 200 and 400 grit paper:

The critical task is obviously the colour matching however, but our friend was very happy with how close Lucy was able to get to the appearances of the original veneer:

This was a pleasing result and a satisfying joint ‘arts and crafts’ project